Showing posts with label Cuttlebug Swiss Dots. Show all posts

Sunday, May 19, 2013

Get Well Soon Card

I thought I would share a card I made for a friend who just had an operation. I thought it would make her smile.


Finished Card: 6" x 6"

Materials:
Cardstock: Two Shades of Red, Brown, Light Brown, White, Yellow, Green, Black and Patterned Paper
Silhouette Image Love Bug Bear
Cuttlebug Embossing Folder Swiss Dots
Small Circle Punch
Fiskars All Year Greetings Clear Stamps, "For You"
Mounting Tape

Inside:
Spellbinders Nestabilities Classic Scalloped Ovals Large, 3rd Largest
Sentiment from Computer "Get Well Soon"

I single mounted the sentiment and the bear with flower.

I had to make an envelope for this card to fit...that was interesting to do...lol.

I am also entering this card into a challenge at Cupcake Inspirations
This is the inspiration photo:


On a bright note, my friend is doing well and hopefully will be out of the hospital this week. :)

Thank you for stopping by. Please leave a comment. 

imagine what you could do...


Thursday, May 3, 2012

Penguin Thanks

At CropStop, the challenge is "Emboss It!" (Use heat or dry embossing on your project). Here is my card:


Finished Card: 4 1/4" x 5 1/2"

Materials:
Cardstock: White, Red, Black and Patterned
Melonheadz Illustrating Digital Image
Spectrum Noir Markers
Home Made "Action Wobble"
Studio G Clear Stamps "Thanks"
Spellbinders Nestabilities Labels Twenty-Three, Largest, Second Largest and Smallest
Black Pigment Ink
Embossing Powder, Black
Cuttlebug Embossing Folder Swiss Dots
Black Ribbon
Mounting Tape

I used three different ways to emboss. I dry embossed the red card stock with the Swiss Dots folder. The black, white and striped patterned card stock is dry embossed with the Spellbinders dies. (It is hard to see the embossing on the striped card stock). The sentiment is heat embossed.
The penguin wobbles back and forth from the home made "Action Wobble". (I can't ever get a photo of the action).

Thanks for stopping by...leave a comment, I always love reading them.

imagine what you could do...

Wednesday, April 11, 2012

Happy Birthday Daddy

I made a card for my son for his upcoming birthday in May from his daughter, Gianna.


The inside:


Finished Card: 4 1/4" x 5 1/2"

Materials:
Cardstock: White, Green, Yellow and Blue
Free Digital Image ( I apologize, I do not know the creator)
Spectrum Noir Markers
Inkssentials Glossy Accents
Cuttlebug Embossing Folder Swiss Dots
EK Success Paper Shapers Corner Adorner Rounder Punch Large
Queen and Co Pearls, Orchid 2 Small
Embroidery Floss for Bow, Pink
Computer Printed Sentiment

I automatically thought of my son and his daughter when I saw this image. I thought it was so cute.

I used Glossy Accents on the water droplets. I rounded the corners on both image and the sentiment corners and I made the tiny bow from two threads of embroidery floss.

I thought I would enter this into two challenges...Die Cuttin' Diva's (use pastel colors) and My Craft Spot (include a sentiment on the inside and outside of a card).

Some of the family was over for Easter dinner and thought I would share two photos of two dishes I made that I had seen on Pinterest.


These are made from Crescent Rolls and I filled them with chicken salad. (They are suppose to look like carrots).


These are yummy mini chocolate trifle cakes. The top ones are a chocolate cup, filled with chocolate mousse, chocolate cake and then more mousse. The bottom ones have peanut butter in them instead of the first portion of mousse.

We didn't see Gianna on Easter, so when she came over today, we had a little egg hunt for her. I think she had a good time.


Thanks for stopping by.

imagine what you could do...
 

Tuesday, April 3, 2012

EGGS-tra Special Easter

I am entering this card into three different challenges: Go Fish (Something Fun or Funny), The Paper Variety (Card and Coordinating Envelope) and Scrappy Moms Stamps (Easter).


Finished Card: 4 1/4" x 5 1/2"

Materials:
Cardstock: White and Two Shades of Pink
$1 Bunny Stamp from Michaels
VersaMark Stamp Pad
Black Embossing Powder
Spectrum Noir Markers
CardzTV with Mary Clear Stamps Easter Punnies "Have an EGGS-tra special Easter!"
Cuttlebug Embossing Folder Swiss Dots
Queen and Co Pearls, Orchid 9 Medium
Mounting Tape
Studio G Clear Stamps, Eggs (on envelope)
Black Pigment Ink (on envelope)

If you read my first post on March 31st, (just scroll down if you would like to see it), you know that I was going to challenge myself to use heat embossing...and this the the second card that I have done just that. I really like the way the embossing came out again. Since it was small areas that needed to be colored, the Spectrum Noir Markers worked fine, but I don't think I would use them for larger areas with the heat embossing. I think there was a chemical reaction going on that  might ruin your larger projects...just my opinion though.

For the envelope, I made a coordinating liner with the colors and the Swiss Dots embossing. I also added a stamped set of eggs for a play on words with the sentiment.

I think I got my money's worth with my Michael's dollar stamp...he is such a funny bunny. Don't you agree?

Thanks for dropping by.

imagine what you could do...

Sunday, January 29, 2012

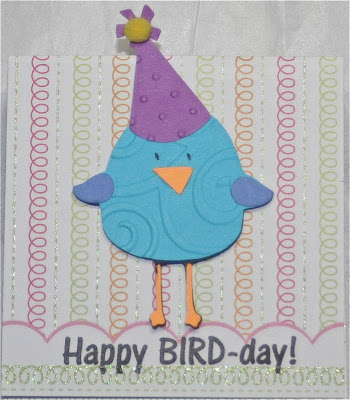
Happy BIRD-day!

Birthday Sundaes has a challenge this week to make an Easel Card with the birthday sentiment on the front. I made this cute little easel card.


And when opened:


and one more angle:


Finished Card: 3" x 3 1/2" ((to the top of the hat)

Materials:
Cardstock: White, Blue, Dark Blue, Yellow/Gold, Purple, Brown, Tan, Pink and Patterned Paper
Cricut Cartridge 3 Birds on Parade Bird 1, page 28 (Base, Shift, Layer 1 Base and Layer 1 Shift); Party, page 63 (Base (cut for the cupcake only), Layer 2 Base and Layer 2 Shift) and Nest, page 75 (Base and Shift)
Cricut Design Studio
CardzTV with Mary Clear Stamps Make A Wish, "Happy BIRD-day!"
Cuttlebug Embossing Folder D'Vine Swirls
Cuttlebug Embossing Folder Swiss Dots
Cuttlebug Embossing Folder Candy Cane Stripes
Inkssentials Glossy Accents
Black Pigment Ink
Small Yellow Pom Pom
Mounting Tape

I made this easel card by cutting a strip of white card stock 3" x 9". I scored at 3", 4 1/2" and 6". Fold to make a "M" shape. Glue the one side of the middle of the "M" to the side...this forms the front of the card. This is the base of the easel card. I added the patterned paper to the inside and decorated. I decorated an extra piece of card stock and adhered it to the front of the card. I hope you understand what I did. If not, you can check out Andrea's Stampin' Moments (click here). (I just changed the measurements).

My husband had bought me the CardzTV with Mary Clear Stamp Set "Make a Wish" for Christmas and as soon as I saw the sentiment "Happy BIRD-day!" I knew I wanted to make a"birdie birthday" card. I like how it turned out. Do you?

Thanks for stopping by...leave a comment.

imagine what you could do...

Wednesday, October 19, 2011

Basketball Lock-Out Birthday Card

Quick post...

My son called me from work tonight and asked me to make him a birthday card for his friend that loves basketball, only with a twist...he wanted a lock on it for the Basketball Lock-Out.

Hope you like the card...


Finished Card: 4 1/4" x 5 1/2"

Materials:
Cardstock: White, Orange, Black, Red, Silver and Black Patterned Paper
Cricut Cartridge Sports Mania Basketball, page 54 (Base, Shadow Base and Blackout Base)
Cricut Cartridge Locker Talk Lock, page 42 (Shift Base and Layers Shift)
Cuttlebug Embossing Folder Swiss Dots
Black Chalk
Mounting Tape
Computer Printed Sentiment

Just a fun goofy card.

imagine what you could do...

Monday, June 13, 2011

Wedding Wishes

This week at Fantabulous Cricut the challenge was "Wedding Wishes" (to make a project with the color white and a bell on it). I made a card:


I feel as though the photo does not do justice to the card ( I guess because of the white on white). There is glitter on the bell and the word "love".  The vellum is in the opening behind the bell. You could actually use this as a wedding or an anniversary card.

Finished size: 4 1/4" x 5 1/2"

Materials:
Cardstock: White and Vellum (Behind the Bell)
Cricut Cartridge Stretch Your Imagination Bell, page 72 (Base and Base Card)
Cricut Cartridge Opposites Attract "love" page 125, (Base)
Cricut Design Studio
Sizzix Frame, Rectangle
Cuttlebug Embossing Folder Swiss Dots
White Glitter (on bell and "love")
Queen and Co Pearls, Pearl 4 Large, 4 Medium and 5 Small
White Ribbon
Mounting Tape

To keep you updated, work is still pretty busy...although I think that will be ending by the end of the month. We painted the one bedroom on Saturday, so the bedroom switch is moving along...thank goodness. I can't wait to get my house back in order. Maybe then I can start on cleaning up my craft area? hahaha (That would take a miracle!)

I harvested some vegetables this past week...lettuce, radishes, onions, and string beans...yum! I have some green tomatoes on the vine and a few hot peppers. Still have to get some flowers planted.

Please leave a comment...I love hearing from you. Have a great rest of the day/week.

imagine what you could do...

Saturday, April 16, 2011

Easter Treat Boxes

First, don't forget about my Give-away from the Fantabulous Cricut Crawl last Monday (click here).

Here are the treat boxes...


and a little closer...


Now I wish I could take credit for these ideas but I actually saw a version of them on two different blogs...the Chicks are from The Bug Bytes and the Carrots are from Small Bits of Paper. I made the Bunnies myself. I would like to thank you Ladies for your inspiration.

I actually made 6 Chicks, 6 Bunnies and 15 Carrots (5 each in 3 different papers). I plan on filling them with Chocolate Kisses in the Chicks and Bunnies and Jellybeans or M&M's in the Carrots. (I just have to  get to the store and buy the candy).

Finished Chick and Bunny Boxes: 2 1/4" x 3 3/4" x 3/4"

Materials:
Cardstock: Patterned Paper, Cream, 2 Shades of Brown, Light Green, Purple, Yellow/Orange and Yellow.
Cricut Cartridge Wrap It Up Diploma (box) page 47, (Box)
Cricut Cartridge Simply Charmed Bunny page 34, (Base), Chick Egg page 35, (Shift Base, Layer 2 Shift, Layer 3 Shift and Layer 4 Shift)
Cricut Design Studio
Googly Eyes
Pink Pom Poms (for Bunny Noses)
Embroidery Floss (For Bunny Whiskers)
Green, Pink, 2 Shades of Purple, Blue and Maroon Ribbon
Pink Chalk (for Cheeks, Ears and Feet)
Black Le Plume II Pen (Thin) (for Bunny Mouths)

I used 4 Screens in Design Studio: (12" x 12" mat)
First Screen...To lay out 4 Boxes. Cut them out 3 times with 3 different Patterned Papers.
Second Screen...6 Bunnies (3 1/2") (3 on one 6"x 6"side and 3 on another. Use "Hide Selected Contour" for all the inside lines in the Bunnies. Cut them out in Cream, Light Brown and Dark Brown. (I cut them out in Green, which I didn't use.) I also have one extra Bunny in the other colors for another project).
Third Screen... 6 Shift Base Chicks (3 1/4") and 6 Layer 2 Shift (bottom layer of egg). (3 Chick Eggs on each of the top 6" x 6" squares and 3 bottom layer eggs each on the bottom 6" x 6" squares of the mat. Cut Chick Eggs in Yellow and the bottom layer eggs in Green and Purple)
Fourth Screen... 6 Layer 4 Shift (top layer of egg) and  6 Layer 3 Shift (Beaks) on another screen (2 eggs each on 3 of the 6"x 6" squares and the beaks on the last 6" x 6" square of the mat.

Finished Carrot Boxes: 1 3/4" x 2 1/2" x 1 1/8"

Materials:
Cardstock: 3 Different Patterned Papers and Clear Craft Plastic
Cricut Cartridge Tags, Bags, Boxes and More Cakebox, page 126 (Window Base)
Cricut Design Studio
Cuttlebug Embossing Folder Swiss Dots (for one carrot box)
Easter Grass

I used Design Studio to lay out 5 boxes on the screen (four in the corners and one in the middle). They were 4 1/2" each.  I cut the Clear Craft Plastic to fit the on the inside of the boxes behind the windows.

 I'm planning on giving them to my family on Easter when they come for dinner. I'm so excited....I can't wait! (I hope they like them as much as I do.)

I hope I inspired you to make these boxes as much as I was inspired when I saw them. Thanks again Ladies.

....imagine what you could do.....


Sunday, April 10, 2011

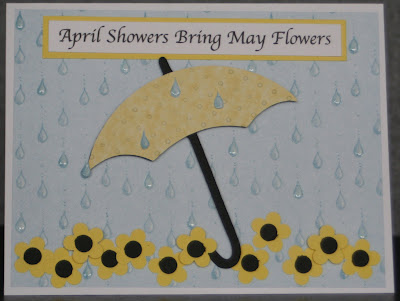
April Showers Bring May Flowers at the Paper Variety Challenge

The theme for this week at The Paper Variety is "April Showers Bring May Flowers". The challenge was photo inspired...you could use any element, like the umbrella or rain boots or the color combination black/blue/yellow.

Here is my card:


This is the inspiration:

                              april+showers.jpg

Finished Card: 4 1/2" x 5 1/2"

Materials:
Cardstock: White, Yellow, Black and Patterned Paper
Cricut Cartridge Forever Young Umbrella page 44, (Base and Shift Base)
Cuttlebug Embossing Folder Swiss Dots
Small Flower Punch
Hole Punch (for the flower centers)
Inkssentials Glossy Accents
Mounting Tape
Computer Sentiment

I cut out a few extra raindrops, put glossy accents on them and glued them on the umbrella. On the inside, I placed three (3) flowers in the bottom left corner. I was able to use the color combination, in addition to the umbrella. I think it turned out pretty nice. 

Now I'm all for the rain to help the plants grow, but hey, enough is enough already. Right now, I think I'll chant " Rain, Rain, Go Away, Come Again Another Day!"  My yard could stand to dry out ...maybe just a little. 

Hope the rain doesn't deter you from doing anything...well, if you have to stay inside, then craft a little...maybe it will make you feel a little more sunnier.

I would love to hear your comments...thanks.

imagine what you could do.....


Thursday, March 31, 2011

Easter Basket

I made this card a while ago but never posted it, so I thought it would work for the challenge at Die Cuttin' Diva's Hippity Hoppity Challenge #8 (...love to see eggs, bunnies, chicks, crosses, baskets...).


Finished Card: 4 1/4" x 5 1/2"

Materials:
Cardstock: Yellow, Two Shades of Green, White, Two Shades of Brown and Two Different Patterned Papers.
Cricut Cartridge Everyday Paper Dolls Outdoor (Basket) page 40 (Accessories Base)
Cricut Cartridge From My Kitchen Eggs page 66 (Shadow/Blackout Base)
Cricut Cartridge Mickey and Friends Sun (Grass) page 127 (Layers: Shoes/Ribbon/Hat Base and Shift)
Fiskars Rope Border Punch
Cuttlebug Embossing Folder D'Vine Swirls (Grass)
Cuttlebug Embossing Folder Swiss Dots
Inkssentials Glossy Accents (On eggs)
EK Success Small Ant Punch (Bunny in basket)
Fiskars Paper Edges (Scissors) 
Ribbon
Brown Marking Pen (Stitches on Basket)
Mounting Tape
Computer Sentiment

I wanted to put a small bunny in the basket, but didn't have one. I saw the ant punch, then thought if I cut off the middle legs, it would look like a bunny...and it worked! Sometimes you just have to think outside of the box! I really like the way this card came out.

Hope you like it too...I would love to hear your comments and/or become a follower. Thanks.

...imagine what you could do...

Thursday, January 27, 2011

Three Challenges ...One Card

Today I thought I would try to put three challenges into one card...first, here is my card: (It's hard to see on the photo but the sentiment reads: " Good Friends are like Stars...")


 and the inside: ("You don't always see them, but you know they are always there")


 The challenges are PaperCraft Star Challenge 30 (click here) Scraplift any project on any current PaperCraft Star Design Team Member's  Blogs; The Paper Variety (click here) Friendship Challenge! There is a quote to use or inspire and the last challenge is CropStop Challenge #4 (click here) Make a Good Impression! Use 2 different patterns of embossing.

For PaperCraft Star, I scraplifted Tracy's card from Challenge #29 (click here to see her card). I used the actual quote from The Paper Variety...although, I split it between the front and the inside. For CropStop, I used actually 3 different embossing folders and I wet embossed the star.

Finished Card: 4 1/4" x 5 1/2"

Materials:
Cardstock: White, Two shades of Pink, Green and Patterned Paper
Sizzix Flower # 1
Cuttlebug Embossing Folder Swiss Dots
Cuttlebug Embossing Folder D'Vine Swirls
Sizzix Embossing Folder Spring Flowers
Tim Holtz Distress Powder Peeled Paint (Green) (embossed a gold star to green)
Olive Green Chalk
White Sheer Ribbon
Queen and Co Pearls Grass Green Six Pearls Two Large, Two Medium and Two Small
Computer Printed Sentiment Basque 12 in Rose
Mounting Tape

Hope that you like this card. It was fun putting the three challenges together. 

We ended up getting at least 10 inches of snow. It's beautiful to look at, but.....well, the dogs like it...hahaha. Guess it's time to get back outside and shovel some more...woo hoo (not). The plows just finally came down our street...the driveway will be a mess again. Oh well....

Leave a comment...Thanks, I always love reading your thoughts. Take some time and do some crafting...imagine what you could do...

Sunday, January 23, 2011

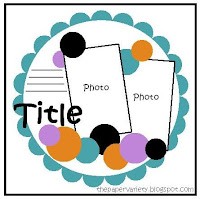
The Paper Variety Week 17 Sketch Challenge

For this challenge at The Paper Variety (click here for their website), I made a layout. Now I'll be honest, I haven't been making many layouts lately, basically because I just prefer making cards. The challenge was to make a card, layout or other paper project using the sketch below:

Here is my layout:


Finished Layout: 12" x 12"

Materials:
Cardstock: Embossed Blue, Teal, Green, Purple, Orange and Patterned Paper
Cricut Cartridge Cupcake Wrappers Scallop (Girly) (Button 37 Shift Toppers)
Cricut Cartridge Cindy Loo "Best Friends" welded
Cricut Design Studio
EK Success Scallop Circle Punch
EK Success 1 1/4" Circle Punch
Cuttlebug Embossing Folder Swiss Dots
Sizzix Embossing Folder Plaid
Mounting Tape

My best friend's name is Trish. We have been friends for, well, over 30 years (geez, it really has been that long, hasn't it?) We have been through just about everything...good and bad, happy and sad, and everything in-between. I don't know what I would do without her. I'm glad that she is in my life.

I hope everyone has a best friend. I think friends are important to have. In addition to Trish, I have several other good friends that I treasure. I really feel that my life is blessed with my friends.

Challenge yourself...whether it is to make a card or a layout or talk to someone new and become a friend...just imagine what you could do.....

Saturday, November 13, 2010

"Family" Autumn Banner

I had seen a few banner blog hops recently and I was inspired to make one myself. Since I am having Thanksgiving dinner this year, I thought this would be appropriate to have hanging up.

Here are some close-ups of the leaves...
Wow..I just noticed in my photos that my walls look gray; in reality, they are peach...weird. Well anyway, I thought it turned out really nice and now I am so inspired that I will be making one for Christmas.
 
Finished banner: approximately 3 feet (from end of leaves; with the ribbon on each end, add about another 8" on each side)
Leaves are cut at 6"
Acorns are cut at 1 1/2" for the ones on the ends, and 1" for the ones in the middle

Materials:
Cardstock: Brown (2 shades), Gold, Orange, Mustard, Rust, Red Orange and Yellow Orange (each leaf in "Family" is a different color. The leaves on the ends are the same as the "M" and "A", respectively.
Cricut Cartridge Cupcake Wrappers, Leaf (Layer Toppers, 7th button)
Cricut Cartridge Create A Critter, Acorn page 32 (Accessory Base and Shift)
Cricut Cartridge George and Basic Shapes, "Give" "Thanks"
Cricut Design Studio
Cuttlebug Embossing Folder D'Vine Swirls
Cuttlebug Embossing Folder Swiss Dots
Sizzix Embossing Folder Plaid (Acorn Tops)
Thin Green Ribbon
3D-Dots

Another thing I noticed AFTER I finished this banner was that I had just bought a tablecloth that had leaves and acorns on it also. Strange how it worked out...lol. I am having 10 people over which should be nice...not too many but not too little. Unfortunately, my husband has to work, so I guess my boys had better help me out. Basically, I am going to try to get as much done beforehand. Going to try NOT to stress. Hahahahahahahaha...well, I'm trying to think that I won't. How about you? When you are entertaining, do you stress out or are you one of the lucky ones that just can relax and have fun. (Boy I envy that). I am better once everything is in place.

More than likely, I am finished with making any fall/Thanksgiving projects. Christmas is on the brain. See you soon. I would love for you to leave a comment. Thanks...and imagine what you could do...

Thursday, October 28, 2010

A Christmas Jar Candle For You

Sometimes inspiration comes in the strangest places. I was posting a card (Oct 23  http://iwycd.blogspot.com/2010/10/3-pspapercraft-star-challenge-18-purse.html) and as I looked at the photograph, I was inspired by the shape of the card. I thought "Jar candle. That reminds me of a jar candle". So, that is where this card came from...


I cut the bottom off so it would "stand" flat to look more like a jar. This is the only difference between the shapes.

Finished card: 5" x 5"

Materials:
Cardstock: White, Red, Yellow, and Silver
Vellum
Cricut Cartridge Christmas Cards, Base Card, 3rd Button Bottom Row
Cuttlebug Embossing Folder, Swiss Dots (The "candle" part is embossed)
Cuttlebug Embossing Folder, D'Vine Swirls (The white is embossed )
Sizzix Die, Candles (Only used the flame part)
Crayola Glitter Glue, Gold
Black Sharpie (Color the wick on the flame)
Merry Christmas Rubber Stamp
Gold Embossing Powder

Here's the inside...


I found the saying on the internet. It was the only one I could find about Christmas candles and I thought it would work.

If you could see the card in person, you would be able to see the embossing better. The vellum hides it in the picture. If I made this card again, I would try my paper crimper on the silver bottom part, instead of just drawing the lines.  Let me know how it turns out, if you try this.

I'm not sure how you are feeling right now, but my mind is all over the place with ideas for cards, but also for the holidays coming up and everything that needs to be done. Just hope I can get focused. In the meantime, take this as an early gift and find some inspiration, cause imagine what you could do....

Sunday, October 24, 2010

To My Best Friend...Happy Birthday Trish.

This card is dedicated to my friend, since it is her birthday today. Hope you have a great one!


It's a gate-fold card and the tag hanging from the gift is free swinging and says "Happy Birthday".

Here is the inside:


Finished card: 5" x 5"

Materials:
Cardstock: Green, White, and Three Different Patterned Papers (Background, Shadow Present, Base Present)
Cricut Cartridge Simply Charmed, Present1, page 67 (Base, Layer 2, Layer 3, Shadow)
Cricut Design Studio (Just to lay it out all on one 12 x 12 mat)
Sizzix Tag, Crescent Combo (Small Tag Only)
Cuttlebug Embossing Folder Swiss Dots
EK Success Border Punch Swiss Cheese
Green Ribbon
Gold Embroidery Floss (To hang tag off present)
Olive Green Pigment Ink
3D-Dots

Trish and I have been friends, well, what seems like forever. And honestly, I don't know what I would do without her. We have been through different stages of our lives and I am always so glad to know that she is there. So, to you, my best friend, Happy Birthday today and may you have many, many more.

And to my crafting friends, I hope you are inspired by my cards...just imagine what you could do!

Tuesday, October 12, 2010

Trick or Treat...

Cute little card...
Here's another picture of the front of the card (might be easier to see)...


Finished card: 5" x 3 1/4"

Materials:
Cricut Cartridge Christmas Cards (Base - Bottom Row 6th button, Layer - Top Row 6th button)
K & Company Spook*tacular Chipbox
Cuttlebug  Embossing Folder Swiss Dots
Cuttlebug Embossing Folder Traffic Jam
Googly Eyes
Inkadinkado All Hallow's Eve Clear Stamps "Happy Halloween"
Brown Pigment Ink

Inside:

I had borrowed the Christmas Cards Cartridge from a friend, (thanks Patti), because I wasn't sure if I really wanted it or not. At first, I didn't really think I would want to buy it. However, after playing with it, I think I will pick one up...but not for the images (at least not yet anyway), but for the shaped cards. I really liked the way they look. I'm sure that if I played with Design Studio a little bit more, I would maybe come up with something close. We'll have to see.

Have you ever felt that you didn't want to get something whether it be a cartridge, an embellishment, or something else and then change your mind? I seem to be doing it a lot lately...lol.

Well, back to playing before I have to give it back...have fun...imagine what you could do...

Saturday, October 2, 2010

Creations With Christina Challenge #6

Ok...challenge #6...Make a card using a fall image or a fall stamp.


What do you think? As much as I love summer, I love the colors of fall.

I know I'm probably repeating myself...but I'm having SO much fun...you should try...imagine what you could do...

Monday, September 20, 2010

Mini Monsters...Creepy

I made two different cards for today (but I will post the other one at another time). Both of these cards were giving me a hard time coming together. I had made the little monster a while ago and just thought she was a cutie.

Finished card is A2 (4 1/4" x 5 1/2")

Materials:
Cricut Cartridge Mini Monsters (Creepy pg 31, Base, Layer 1, Shift Layer 1, Layer 2, Base Shadow)

Cardstock for Monster:  Lt Pink (Layer 1), Med Pink (Base Shadow), Dark Pink (Base), White (Layer 2), Silver (Shift Layer 1)
Cardstock for card: Pattered for base, Med Pink, White, Gray
EK Success Corner Adorner Basket Weave
EK Success Corner Adorner Rounder Punch - Large
Cuttlebug Embossing Folder Swiss Dots
Cuttlebug Embossing Folder D'Vine Swirls
1/4" wide Light Pink Ribbon

Directions:
1. Patterned Cardstock (4 1/4" x 11") Score on patterned side at 5 1/2". Score on backside at 2 3/4". Fold (making a "Z" shape)
2. Cut Creepy (2 1/4") and layers. Emboss body base with D'Vine Swirls.  Put all layers together. Glitter wings. Glue on googly eyes (Two (2) different sizes)
3. Cut med pink cardstock 4 1/4" x 3 1/4". Punch two (2) opposite corners with Basket Weave.
4. Cut white cardstock 2 3/4" x 3 3/4". Emboss with D'Vine Swirls. Punch two (2) opposite corners with Corner Rounder (cut the opposite corners from the Basket Weave corners)
5. Cut gray cardstock 3 3/8" x 2 3/8". Emboss with Swiss Dots. Punch the same two (2) opposite corners as the white cardstock.
6. Layer the gray onto the white and glue. Tuck into the basket weave corners.
7. Cut med pink 4 1/4" x 3 1/4" and glue to the back of the Basket Weave assembly (this hides the white cardstock from showing through the basket weave). Place glue only on one half (left side as you are looking at the front) and center on the front of the patterned card.
8. Place 3D-Dots on back of Creepy and center on the gray cardstock.
9. Tie ribbon around front side of card. Make a knot then make a bow. Glue under the bow so it doesn't move.

For the inside:
1. Cut med pink cardstock 3 1/4"  x 3 1/2". Punch two (2) opposite corners with Basket Weave (the other two corners from the front).
2. Cut white cardstock 2 3/4" x 3". Stamp the sentiment and tuck into basket weave corners. Glue to inside, make sure that when the card is closed, the front covers it.

Hope that wasn't too hard to understand...it's easier than it sounds. Really! This is another one of those cards that the sentiment could change...Happy Birthday, Happy Valentine's Day, Thinking of You, etc.

On another note...had a great time with my youngest son last Friday. He's away at college, so I drove up to see him. We then went into New York City  and saw a play...(off Broadway) "The 39 Steps". It was so good. Four actors play like 150 parts. Very funny. If you get a chance to see it, I highly recommend it.

So, get creative and if you get stuck, put it away, and go back to it later...(took me weeks)...finally it will come together...imagine what you could do.......

Saturday, August 14, 2010

A Different Look

Just a quick post right now. Just by turning the card and using different papers, you can change the look. The directions are exactly the same as in my earlier post.

I hope this inspires you to try a variation...I can only imagine what you could do...

Sunday, August 8, 2010

Monogram Notecards

I know it's not even the end of summer yet, but I always start thinking about Christmas this time of year. I thought this would be a great gift for someone.


I used the Cricut cartridge Tie the Knot and cut out six (6) Monogram letters and six (6) Shadow Monogram letter A's. (I only show three of each in this picture). These are cut at 2 1/2". Using the quantity key makes this pretty easy.

For the base of the card, I cut an 8 1/2" x 11" piece of white cardstock in half (at 5 1/2"). I then folded the cardstock in half at 4 1/4". You actually get two bases out of one sheet. Repeat two (2) more times to get 6 base cards.

Next, cut out six (6) 3 3/4" x 5" rectangles out of white cardstock. Emboss each rectangle with your favorite embossing folder.  There is a blank card on the top left...(clockwise) I used Quikutz Lines and Dots, Cuttlebug D'vine Swirls, Swiss Dots, Spots and Dots, Tiny Mosaic, and Traffic Jam. You may want to use only one folder for all six cards.
Then, I cut out six (6) rectangles 4" x 5 1/4" of cardstock the same color as the shadow monogram. Center and glue to base card. Next, glue the embossed cardstock pieces to the colored cardstock.

(Sorry...The embossing is difficult to see in these photos.) Finally, glue the Monogram letter to it's Shadow and glue to the embossed cardstock.


These photos show all six (6) different note cards.

On the next post, I will show you how I packaged these cards in order to give as a gift.

I hope you are becoming inspired to try something on your own. I would love to hear from you and what you think. Please leave a comment. Hope to hear from you, until then.....imagine what you could do!
Related Posts with Thumbnails