Showing posts with label Cricut Cartridge Everyday Paper Dolls. Show all posts

Sunday, April 28, 2013

CardzTV Blog Hop "You're the Man!" Day 2 (Sunday Team)

We're having a Blog Hop here at CardzTV. Welcome!!! This is Day 2 and this is the Sunday Team. Yesterday the Saturday Team showed off their wonderful projects.
Now if you have come from Barbara's blog, then you are in the right place. The hop is showing off one of Mary's newest stamp sets..."You're the Man!" This set has so many great and manly sentiments...and a couple mustaches! lol Check out all of Mary's stamp sets here. 

I made a card with an Action Wobble:


Finished Card: 4 1/4" x 5 1/2"

Materials:
Cardstock: White, Tan, Teal, Black and Two Different Patterned Papers
Cricut Cartridge Accent Essentials Accent 4, page 75 (Base)
Cricut Cartridge Everyday Paper Dolls Head, page 28 (Base Shift); Farmer (Hat), page 68 (Headwear Shift)
Cricut Design Studio
CardzTV with Mary Clear Stamps You're The Man!, "You're the MAN!"; Large Mustache
Cuttlebug Embossing Folder Diamond Plate
Two Wiggle Eyes
Black Pigment Ink
Action Wobble
Small Circle Punch
Mounting Tape

Unfortunately, my camera will not let me get a picture of the Action Wobble in action. The eyes wiggle when it shakes back and forth also. I single mounted the head, the mustache and the sentiment. Now with Father's Day just around the corner, this would make a great card or it could be used for a birthday. I thought it turned out cute. Hope you do also...

Now don't forget that Mary always has some Blog Candy...2 sets of stamps...just make sure you leave a comment over there at CardzTV. Winners will be announced on Monday.

I also have some blog candy...woo hoo! Don't you just love it?


I have a 6" x 6" Designer Paper Pad and a 3 piece set of Darice Embossing Borders.
Please leave a comment AND a way to contact you on THIS post by Monday, April 29th Midnight EST. I will announce the winner on Tuesday or Wednesday. I would also appreciate it if you would become a follower. 

 Your next and last stop on the hop is Melissa. However, if you want to start from the beginning for Day 2, here is the full line-up:

Thanks for stopping by. 

imagine what you could do...


Monday, November 26, 2012

What's Cooking?

I made a card for my son's friend. He is going to school to become a chef and today he is 21.

Here is my card:


Finished Card: 4 1/4" x 5 1/2"

Materials:
Cardstock: White, Light Brown, Dark Brown, Tan and Patterned Paper
Cricut Cartridge Everyday Paper Dolls Body, page 28 (Base); Winter G (Shirt), page 37 (Shift); Chef, page 72 (Base, Headware Base, Headware Shift and Accessories 1 Base); Cook (Spoon and Spatula), page 73 (Accessories 2 Shift)
CardzTV with Mary Clear Stamps FAQ's, "What's Cooking?"
Black Pigment Ink
Mounting Tape

I think I covered all bases with this one...lol.

Hope you like it

Thanks for stopping by. Please leave a comment.

imagine what you could do...

Tuesday, May 22, 2012

Banner, Buttons and/or Birthday

I am so honored that I was asked to be a Guest Diva this week at Die Cuttin' Diva's. Thank you so much. The challenge is Banner, Buttons and/or Birthdays.

Here is my card:


Finished Card: 4 1/4" x 5 1/2"

Materials:
Cardstock: White, Dark Brown, Green, Orange, Blue and Patterned
Cricut Cartridge Everyday Pop-Up Cards Circus, page 66 (Base, Shift, and Layer 1 Base)
Cricut Cartridge Everyday Paper Dolls Zoo (Elephant), page 75 (Accessories 1 Base)
Cricut Cartridge Country Life Cow (Banner), page 44 and 45 (Banner Shift)
Aunt Lydia's Crochet Thread
Stamp Craft Dot Alphabet Stamps "A", "B", "D", "H", "I", "P", "R", "T" and ""Y"
Brown Pigment Ink
Charcoal Chalk
Queen and Co Pearls Grass Green, 1 Large, 2 Medium and 2 Small
2 Large Blue Buttons
Mounting Tape

I tried to incorporate all three items in the challenge...the banner, the buttons and the birthday. I'm pretty happy how it turned out. I single mounted the banner, the circus wagon and the elephant. Since the elephant doesn't have any layers, I chalked it so the details would show.

Don't forget to check out the design team's projects and thank you again for allowing me to be a Guest Die Cuttin' Diva this week. Glad you stopped by...leave a comment and let me know what you think.

imagine what you could do...

Friday, May 11, 2012

Roaring Good Birthday

Sorry, it feels like I haven't been around a lot (although it's been only a couple of days). My husband isn't feeling well and I had a doctor's appointment. Work is getting to me, plus I just couldn't get in the mood to create anything (a majority of the challenges are for Mother's Day and since my mother is not here, I couldn't get motivated)...that is until last night....I finished 3 cards (none of which are for Mother's Day lol) and have another one almost done. I'll try to share them over the next couple of days.

At CropStop this week, the challenge is to "Show Us the Animal In You!" (Use an animal or animal print in your project). Here is what I came up with:


I ain't "Lion", I really like the way this card turned out! (Ok! Ok! I know...that was bad but I made you smile, didn't I?)

Finished Card: 4 1/4' x 5 1/2"

Materials:
Cardstock: White, Two Shades of Yellow/Gold, Black, Red and Striped Patterned Paper
Cricut Cartridge Everyday Paper Dolls Zoo (Lion), page 75 (Headwear Shift)
CardzTV with Mary Clear Stamps Critter Captions "Have a ROARING Good Birthday!"
White Pigment Ink
Clear Embossing Powder
Pink and Charcoal Chalk
Mounting Tape

I cut the lion out twice (once in each shade of yellow/gold). Next, I cut off the "mane" on the lighter lion. I taped a piece of scrap black card stock to the back for the nose and eyes to show. I chalked a little charcoal for shadow on the darker lion, then chalked with both charcoal and pink the lighter lion...I wanted to bring out the details in the cuts. I then took an eraser and went over both lions to remove excess chalk. I actually did this several times until I was satisfied. Next, I glued the lighter lion onto the other image. The darker card stock had a little texture to it, so I didn't feel the need to emboss it with anything else. I hand cut the banner triangles. The sentiment was heat embossed with clear embossing powder. I single mounted everything to give more dimension.

Better get the rest of my day started now...have a good one. Hope you liked my card.

Thanks for stopping by.

imagine what you could do...


Thursday, May 5, 2011

Graduation Card

Well, I'm back...finally! Feels like I have been gone for a long time! If you read one of my earlier posts, you know that my monitor died and that I could not use my Design Studio. (I was SO lost without it!) Anyway, I wasn't sure what I was going to do...well, you won't believe this but it just started working again. WOO HOO! I am not questioning what happened, just happy that it's back.

We have a graduation next month for our niece. So, I also thought this would be perfect for two challenges...Die Cuttin' Diva's (sketch) and Celebrate the Occasion (Graduation).


Finished Card: 4 1/4" x 5 1/2"

Materials:
Cardstock: White, Black, Yellow and Two Patterned Papers
Cricut Cartridge Accent Essentials Accent 50, page 81 (Base)
Cricut Cartridge Everyday Paper Dolls Grad, page 46 (Shift Base)
Cricut Design Studio
Cuttlebug Embossing folder Swiss dots
Inkadinkado Happy Everything Stamp Set, Congradulations
Yellow Embroidery Floss
Mounting Tape
White Gel Pen
Black Pen

The big tassel on the side is not attached except by the embroidery floss at the top, so it swings freely. I really like the way it turned out.

Hope you like the card. I would love for you to become a follower and/or leave a comment....thanks for stopping by....

Going to go work on another card or two, maybe even a layout (and finish the wash...lol)...

...imagine what you could do......

Thursday, March 31, 2011

Easter Basket

I made this card a while ago but never posted it, so I thought it would work for the challenge at Die Cuttin' Diva's Hippity Hoppity Challenge #8 (...love to see eggs, bunnies, chicks, crosses, baskets...).


Finished Card: 4 1/4" x 5 1/2"

Materials:
Cardstock: Yellow, Two Shades of Green, White, Two Shades of Brown and Two Different Patterned Papers.
Cricut Cartridge Everyday Paper Dolls Outdoor (Basket) page 40 (Accessories Base)
Cricut Cartridge From My Kitchen Eggs page 66 (Shadow/Blackout Base)
Cricut Cartridge Mickey and Friends Sun (Grass) page 127 (Layers: Shoes/Ribbon/Hat Base and Shift)
Fiskars Rope Border Punch
Cuttlebug Embossing Folder D'Vine Swirls (Grass)
Cuttlebug Embossing Folder Swiss Dots
Inkssentials Glossy Accents (On eggs)
EK Success Small Ant Punch (Bunny in basket)
Fiskars Paper Edges (Scissors) 
Ribbon
Brown Marking Pen (Stitches on Basket)
Mounting Tape
Computer Sentiment

I wanted to put a small bunny in the basket, but didn't have one. I saw the ant punch, then thought if I cut off the middle legs, it would look like a bunny...and it worked! Sometimes you just have to think outside of the box! I really like the way this card came out.

Hope you like it too...I would love to hear your comments and/or become a follower. Thanks.

...imagine what you could do...

Tuesday, March 15, 2011

Crabby Card

Thought I would play along with Two Scraptastic Gals "Life's A Beach" Challenge and Die Cuttin' Diva's  Unused and Unloved Challenge (Use a cart that you never or rarely use and use a cut you have never used).

Fun, silly card. Think I'll have to use both these carts more...lol.

Finished Card: 4 1/4" x 5 1/2"

Materials:
Cardstock: White, Blue, Yellow, Red Patterned Paper, Blue Patterned Paper and Sandpaper
Cricut Cartridge Life's a Beach Crab, page 72 (Base)
Cricut Cartridge Everyday Paper Dolls Outdoor (Sun) page 40 (Accessories 3 Shift)

Two Different Size Googly Eyes
Computer Sentiment
Yellow Pigment Ink

I freehand the cut to make clouds around the sentiment. The waves are just torn paper showing the white in order to look like whitecaps. The sand is just...sandpaper.

Would love to hear your comments....have a great day....

imagine what you could do.....

Three Birthday Cards...and Another Sign of Spring

I have several birthdays coming up that I need to send cards for. The first one is for a friend of mine that I haven't seen in, well, too many years. We do talk on the phone and on facebook. Ah, the wonders of technology...lol.
We use to bowl together. I think he'll like this card.

Finished Card: 4 1/2" x 5 1/2"

Materials:
Cardstock: White, Red, Black, Gray and Patterned Paper
Cricut Cartridge Everyday Paper Dolls Clown (Club/Bowling Pin) page 58, (Accessories 2 Shift)
EK Success 1 3/8" Circle Punch
Hole Punch
Inkadinkado Happy Everything Clear Stamp "It's your birthday!"
Gray Chalk
Mounting Tape

The next card is for my best friend's husband.
(I covered his name.) I hope he appreciates the computer as he works on them all day.

Finished Card: 4 1/4" x 5 1/2"

Materials:
Cardstock: White, Black, Gray and Patterned Paper
Cricut Cartridge Locker Talk Laptop page 52 (Base shift, Layers Shift)
Cuttlebug Embossing Folder Diamond Plate
Charcoal Chalk
Studio G Clear Stamp "happy birthday"
Mounting Tape

The next card is for my neighbor and friend.

She is partial to butterflies as they are a nice reminder of her mother.

Finished Card: 4 1/4" x 5 1/2"

Materials:
Cardstock: White, Four Shades of Orange, Black and Patterned Paper
Cricut Cartridge Florals Embellished Butterfly 2 page 64 (Shift Base, Layer 1 Base and Layer 1 Shift Base)
Doodlebug Crushed Velvet Flock Black
Mounting Tape

This was the fun part...making the cards. Now for the hard part...remembering to send them...lol. I am so bad with that. At least I feel as though I'm ahead of the game right now.....

Here's a little glimmer that Spring is on it's way...
I saw my first robin a couple of days ago. This one was sitting out back this morning. Actually, he was out front first, on a pole (picture perfect), but I didn't have my camera handy. I ran upstairs to get it, but he was gone by the time I got back. I looked out back (just in case) and there he was. (Yes, I do realize that it COULD be a different robin, but I really don't think so...he was a fat bugger...lol)

Hoping that your day goes well...until the next posting....enjoy...imagine what you could do....

Tuesday, January 11, 2011

Fantabulous Cricut Challenge #42 Winter Warmies

This is my card for Fantabulous Cricut Challenge this week. These are the instructions:


Challenge #42 Winter Warmies
Create using some type of winter clothing/accessory on your project (i.e.: mitten, sweater, hat etc.)


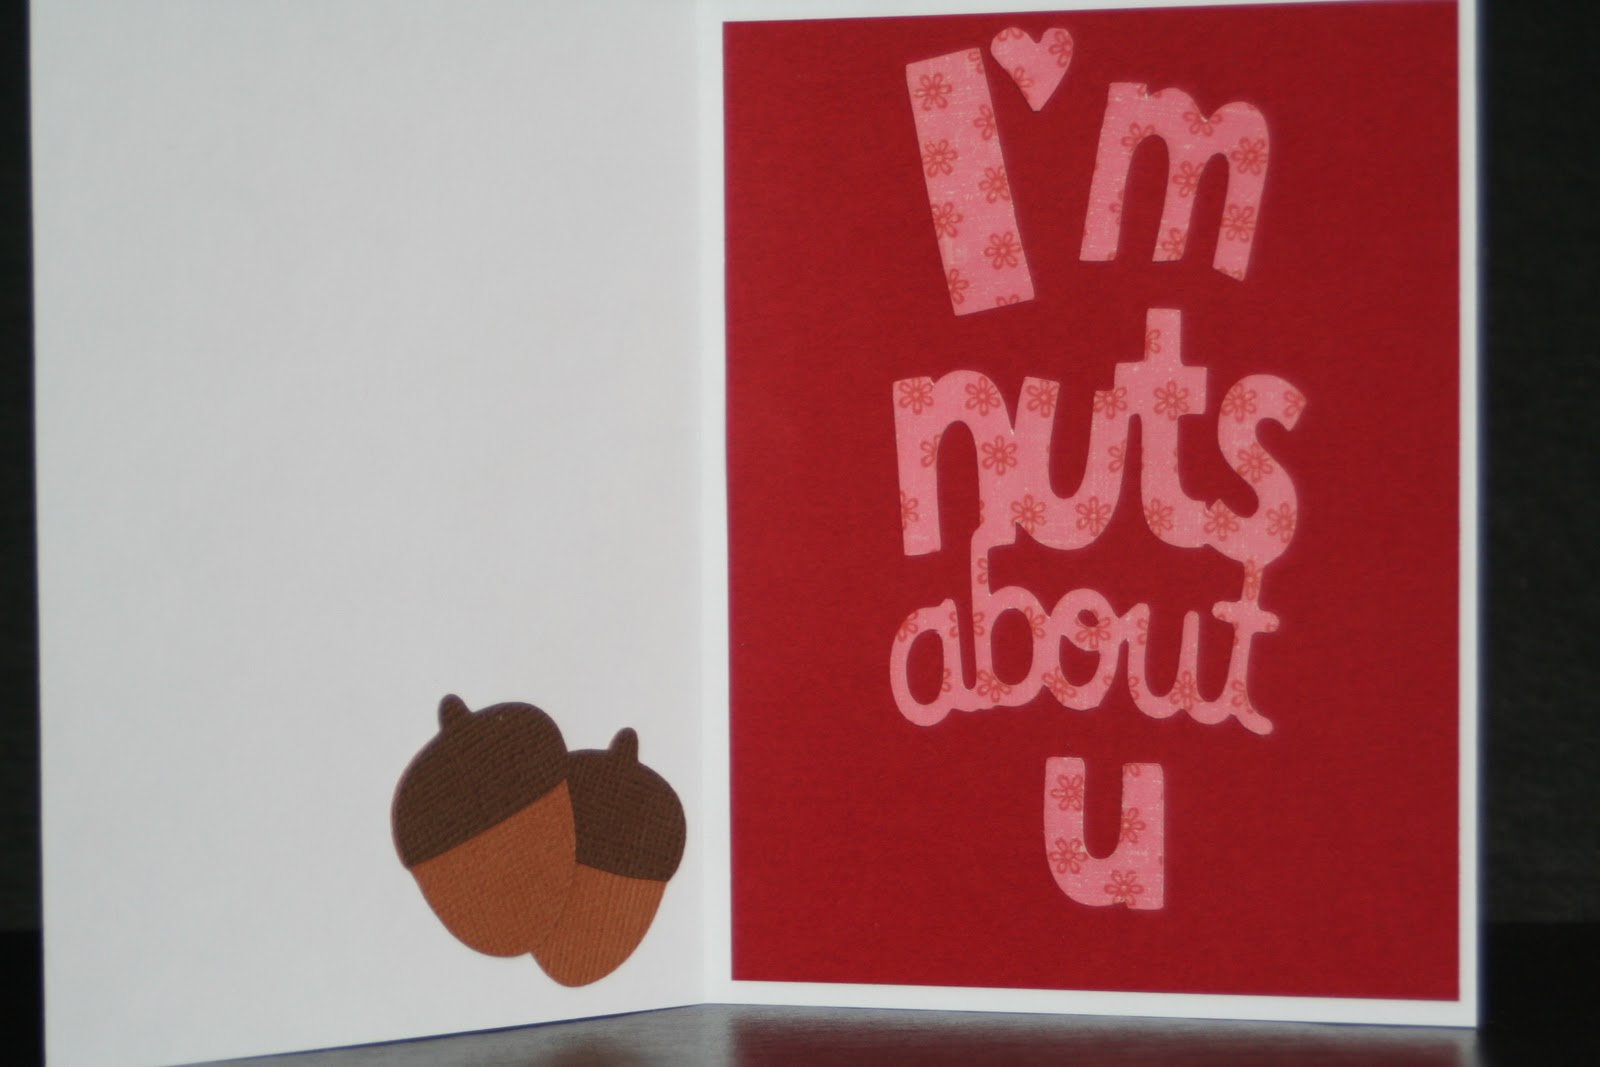
Well, as you can see, I have Valentine's Day on the brain. (Thought it came out cute).

Finished Card: 4 1/4" x 5 1/2"

Materials:
Cardstock: White, Black, Pink, Dark Red, Dark Brown, Medium Brown, Tan and Patterned Paper
Cricut Cartridge Create A Critter Squirrel page 32 (Base, Layer 1, Layer 2, Layer 3), Nuts (Accessory and Shift Accessory), "nuts about u" (Phrase)
Cricut Cartridge Mickey Font "I" and "m"
Cricut Cartridge Everyday Paper Dolls Winter B (Hat and Gloves) page 36 (Shift Headwear, Shift Accessories 1)
Cricut Design Studio
Cuttlebug Embossing Folder Heart Blocks
Doodlebug Design Crushed Velvet Flock White
Martha Stewart Tinsel Glitter Crystal
Colorbok Metal Accents Hearts
Computer Printed Sentiment "Happy Valentine's Day"

Hope you like the card. Would love to hear from you...leave a comment. Thanks.
Get inspired...try a challenge, imagine what you could do (you might me surprised!)
Related Posts with Thumbnails