Showing posts with label Cuttlebug Candy Cane Stripe. Show all posts

Friday, August 24, 2012

Digi Haven Challenge "Days Gone By"

This week at Digi Haven, we are going Vintage. We were asked to use any Free Vintage or Old World image.

My card:


Finished Card: 4 1/4" x 5 1/2"

Materials:
Cardstock: White, Purple and Teal
Clearly Vintage Image
Spectrum Noir Markers
Cuttlebug Embossing Folder Candy Can Stripe
Queen and Co Pearls Pearl, 4 Small
Mounting Tape

The image prints out in grayscale, which I think makes it look older anyway. I lightly colored the skin, dresses, shoes and hair. When I look at this image, I think that this could have been me and my best friend. (I'm the one in blue...lol She is a little daintier than I am....hahaha). I should send this to her for her birthday....now there's a thought!

Hope you like what I made. Thanks for stopping by. I would love to hear what you think (so leave a comment).

Join us for the challenge...there are lots of free vintage images out there!

imagine what you could do...


Tuesday, February 7, 2012

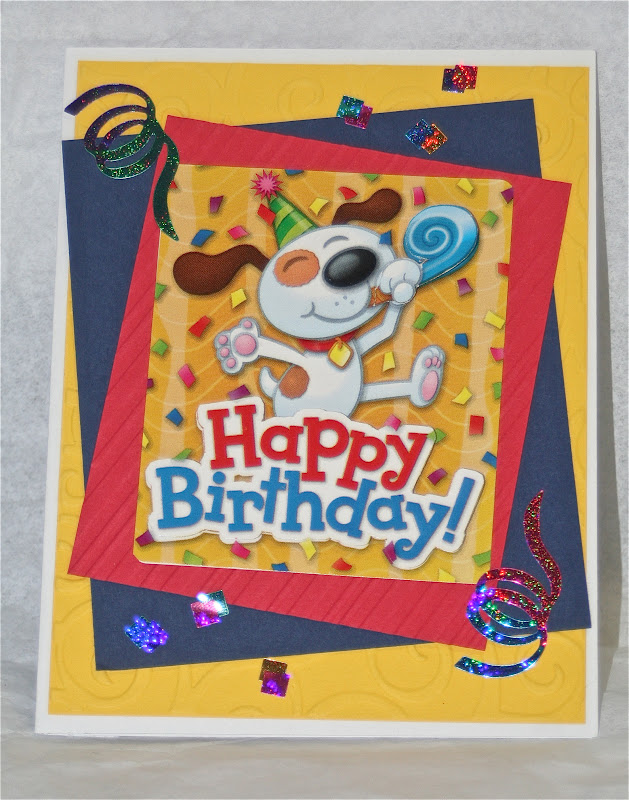
Birthday Card...Celebrating Dog

I bought these teacher's supply stickers at work the other day...discounted ( I love that!) and the card just seemed to make itself.


Here's another angle so (hopefully) you can see the dimension on the sentiment and the horn:


Finished Card: 4 1/4" x 5 1/2"

Materials:
Cardstock: White, Yellow, Red and Blue
Teacher's Supply Stickers, Happy Birthday Dog, 2 of them
Cuttlebug Embossing Folder D'Vine Swirls
Cuttlebug Embossing Folder Candy Cane Stripe
Nicole Stickers Confetti
Mounting Tape

I cut out the sentiment and single mounted it over the original. I then cut out the horn and mounted it with a single piece near the mouth and a double piece at the end so it would look like it was sticking out further. Quick and easy card. I have more of these stickers (they came in a pack) and I have a few other ideas for them.

I am submitting this into the Birthday Sundaes and Celebrate the Occasion challenges this week.

Thanks for stopping by.

imagine what you could do...

Sunday, January 29, 2012

Happy BIRD-day!

Birthday Sundaes has a challenge this week to make an Easel Card with the birthday sentiment on the front. I made this cute little easel card.


And when opened:


and one more angle:


Finished Card: 3" x 3 1/2" ((to the top of the hat)

Materials:
Cardstock: White, Blue, Dark Blue, Yellow/Gold, Purple, Brown, Tan, Pink and Patterned Paper
Cricut Cartridge 3 Birds on Parade Bird 1, page 28 (Base, Shift, Layer 1 Base and Layer 1 Shift); Party, page 63 (Base (cut for the cupcake only), Layer 2 Base and Layer 2 Shift) and Nest, page 75 (Base and Shift)
Cricut Design Studio
CardzTV with Mary Clear Stamps Make A Wish, "Happy BIRD-day!"
Cuttlebug Embossing Folder D'Vine Swirls
Cuttlebug Embossing Folder Swiss Dots
Cuttlebug Embossing Folder Candy Cane Stripes
Inkssentials Glossy Accents
Black Pigment Ink
Small Yellow Pom Pom
Mounting Tape

I made this easel card by cutting a strip of white card stock 3" x 9". I scored at 3", 4 1/2" and 6". Fold to make a "M" shape. Glue the one side of the middle of the "M" to the side...this forms the front of the card. This is the base of the easel card. I added the patterned paper to the inside and decorated. I decorated an extra piece of card stock and adhered it to the front of the card. I hope you understand what I did. If not, you can check out Andrea's Stampin' Moments (click here). (I just changed the measurements).

My husband had bought me the CardzTV with Mary Clear Stamp Set "Make a Wish" for Christmas and as soon as I saw the sentiment "Happy BIRD-day!" I knew I wanted to make a"birdie birthday" card. I like how it turned out. Do you?

Thanks for stopping by...leave a comment.

imagine what you could do...

Friday, December 9, 2011

CardzTV Challenge # 2 "Crafty Christmas"

Before I get to the challenge, I would like to apologize for not being around. I did not expect to be working as many hours as I am for as long as I have been. I am trying to make enough time for everything. I also am trying to get all the holiday stuff organized, as most of us are. (I'm hosting a cookie exchange this coming weekend). I have not had a lot of time to craft for my blog. :( Hopefully this will not be an issue for too long.

Now, onto the challenge....

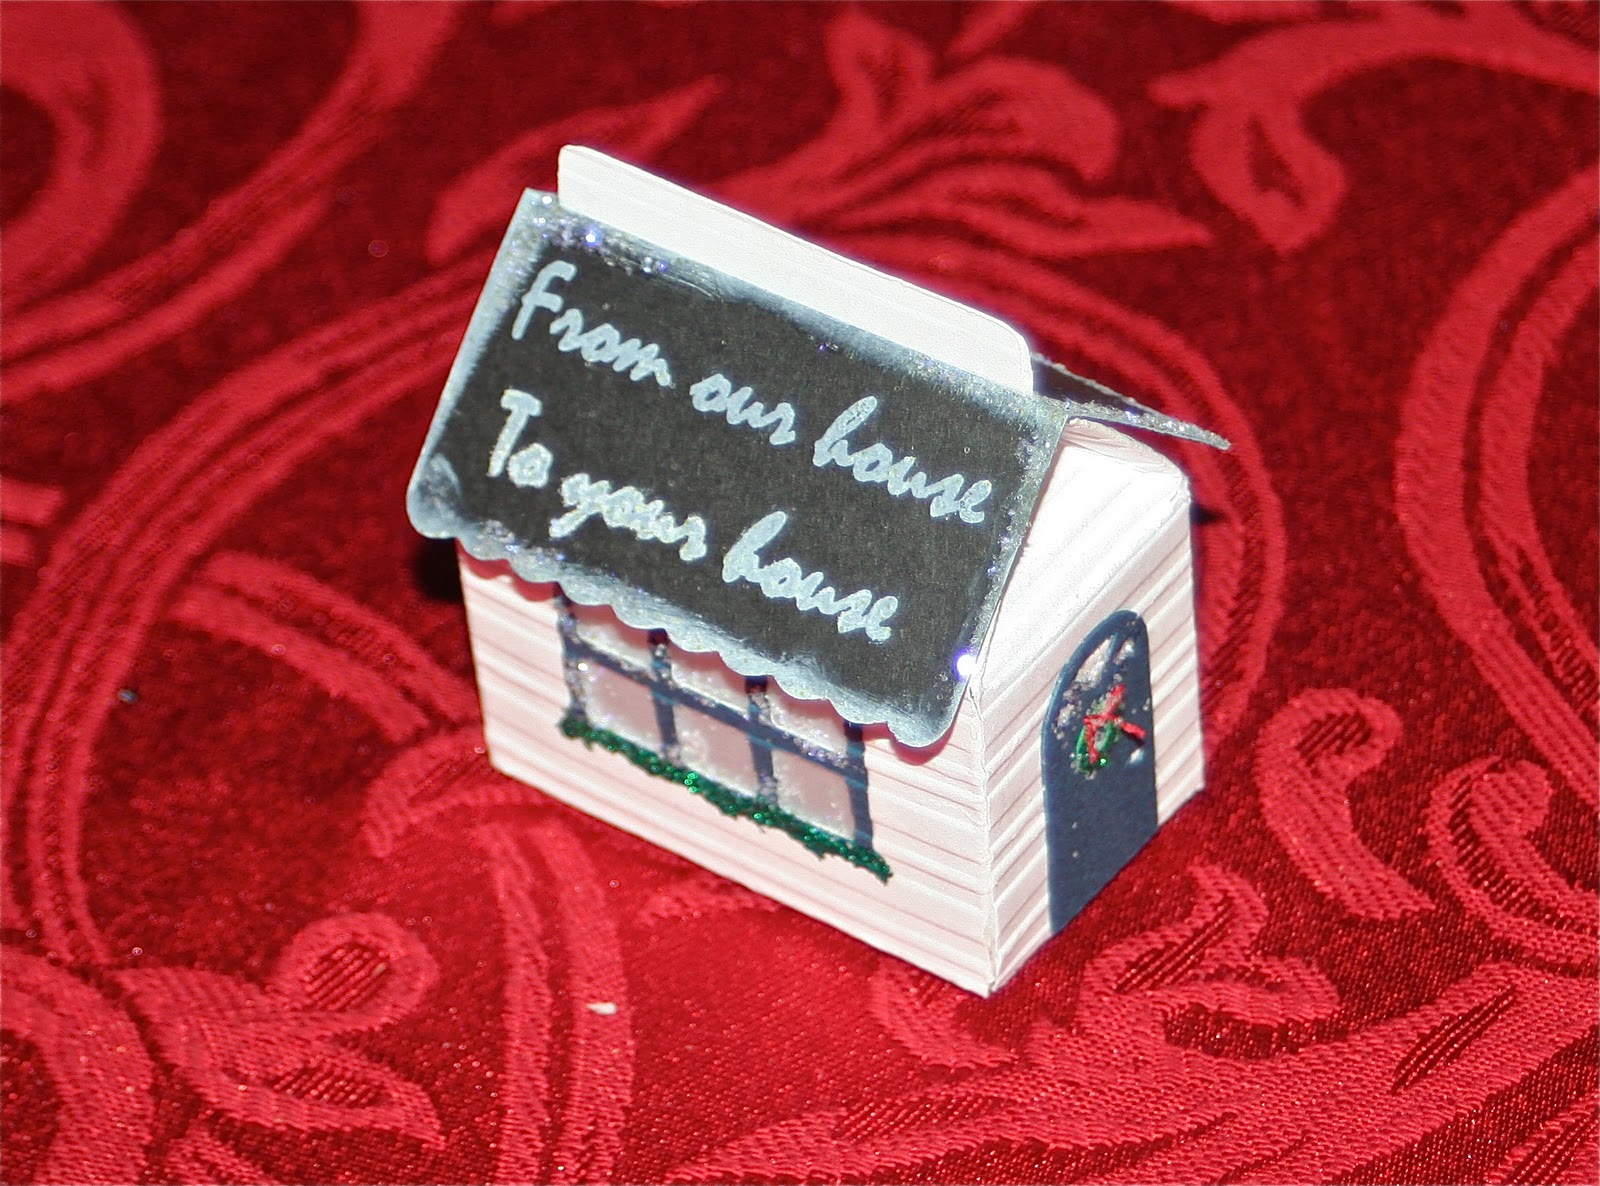
This week the challenge at CardzTV is called "Crafty Christmas" (Make a Christmas project using CardzTV Stamps). I made a candy box/ornament/tag...


Finished Project: 1 3/4" x 2 1/4" x 2 1/2"

Materials:
Cardstock: White, Black, Blue and Vellum
Cricut Cartridge Sweet Tooth Boxes House, page 40 (Button 6, Button 16 and Button 26)
Cricut Design Studio
CardzTV with Mary "Holly Jolly" Clear Stamp Set, "From Our House to Your House"
Cuttlebug Embossing Folder, Candy Cane Stripe
White Pigment Ink
Glitter
Stickles, Green
Embroidery Floss, Red 1 Strand

I used the vellum as window panes, the glitter as snow on the windows and roof and the Stickles as the garland under the windows and the wreath on the door. The bow on the door wreath is made with 1 strand of embroidery floss. I thought the embossing folder made it look like siding on a house.

I was going to put Hershey Kisses or M&M's inside as an extra goodie. Make a small hole in the center of the top and tie a ribbon loop in order to use as a tag or an ornament. To use as a tag, you could stamp "To:" and "From:" on the blank side of the roof and use a white gel pen to write the names.

Don't forget that Mary at CardzTV is giving away 2 sets of stamps..."Encouraging Thoughts" and "Make A Wish" to the winner. Good luck! Please check out all the great projects from the other designers also.

Thanks for stopping by....I would love to hear from you, so leave a comment. (I wouldn't mind if you became a follower either). See you soon...

imagine what you could do....

Thursday, October 14, 2010

Papercraft Star Challenge...BOO


Papercraft Star is having a challenge. You can check it here: http://papercraftstar.blogspot.com/ . Basically, you needed to look at a photograph and use it to inspire you to make a project. From the picture, I wanted to use circles, stripes, "Boo", a spider, white, black, and orange.

Finished card: 5" x 5".

Materials
Cricuit Cartridge Create A Critter, Pumpkin (Base Shift page 70)
Cricut Cartridge Pumpkin Carving Spider and "BOO"
Cricut Design Studio
Cuttlebug Embossing Folder Spots and Dots
Cuttlebug Embossing Folder Candy Cane Stripe
EK Success Border Punch Swiss Cheese
Cardstock: Black, White, Orange and Orange/Gold
Martha Stewart Flocking Powder Ebony
Ribbon
Embroidery Floss

This is a close up so you can see the embossing on the background and pumpkin.

I think that I accomplished what I set out to do. Hope you like the card. It was fun to challenge myself again and see what I could do..now you should join in and just imagine what you could do....

Thursday, October 7, 2010

It Screamed Birthday to Me

This is my second post for today.

I was looking through my paper (Confession...I just love paper...the prints, the textures, the colors...everything) and I saw this one print and it just screamed Birthday to me. So that's what I had to make...


It's a Gate-fold Card. Finished size: (A2) 4 1/4" x 5 1/2"

Materials:
Cardstock: White, Pink, Purple and Patterned Paper
Sizzix Die Present
Cuttlebug Embossing Folder Candy Cane Stripe
White Pigment Ink
Clear Embossing Powder
Inkadinkado Happy Everything Stamp, "Happy Birthday"
Glitter

Here's the inside:


After I finished this card, I thought that it would make a great Christmas card also..just changing up a few things.
Here is my other version:


Same finished size.

Materials:
Cardstock: White, Red, Green and Patterned Paper
Sizzix Die, Present
Cuttlebug Embossing Folder Spots and Dots
White Pigment Ink
Clear Embossing Powder
Recollections Clear Stamps, North Pole "Merry Christmas"
Glitter

And the inside:


I really like both versions of this card. What do you think? Actually, I think this makes a great base for many different cards...just use your imagination...and imagine what you could do...
Related Posts with Thumbnails