Saturday, April 28, 2012

Pinwheels

I was looking through the new posts today and I was totally inspired by the Pinwheel card at BugBites. I had to give it a try.


I then decided to make another one BUT THIS ONE SPINS.......


So COOL...(I know it's hard to tell in pictures....if you look at the pink squares, you can see they are in different positions).

Finished Cards: 4 1/4" x 5 1/2"

Materials for Both Cards:
Cardstock: White and Scraps of Patterned Paper
StazOn Jet Black Ink
Button
Mounting Tape

Additional Materials for First Card:
CardzTV with Mary Clear Stamps Encouraging Thoughts "Smile!"
Homemade "Bakers Twine" with Aunt Lydia's Crochet Thread and Spectrum Noir Markers

Additional Materials for Second Card:
Martha Stewart Punch All Over the Page Scallop Square
CardzTV with Mary Clear Stamps Happy Days "Happy Birthday!"
Two Small Washers
Small Eyelet
Brad
Ribbon

To see a tutorial on how to make a basic pinwheel card and the dimensions, Click Here (OWH Stars and Stripes). For the second card, I had to adjust the size of the larger squares to 3 1/4", since the scallop squares cut larger than the original ones by 1/4" each.

In order to allow it to spin, I put an eyelet in the center of the pinwheel. Next, I placed one washer on a brad, pushed the brad through the eyelet, placed the other washer on, then bent the ends of the brad to secure (make sure it's not too tight, or it won't spin). I single mounted the pinwheel on the card (only where the brad attaches). Finally, I glued the button to the top of the brad to finish it off.

The "stick" on the first card is a scrap of card stock that is single mounted like the pinwheel. The "stick" on the second card is ribbon. I threaded the "Twine" through the button and tied a bow on the first card.

Hopefully, this wasn't too confusing. LOL. It's really a very simple card that is fun and fast to make AND the possibilities are endless with ALL the scraps of papers that we all have. I hope I inspired you to try this as much as BugBites inspired me!

I'm going to enter the second card into the Celebrate the Occasion challenge (Birthday Card with Ribbon).

imagine what you could do.....

Friday, April 27, 2012

Pop Pop and Gianna

I made this card for Gianna to give to my husband for Father's Day. He just loves fishing, but doesn't get the chance to go too often. I'm sure he'll take Gianna with him sometime. As soon as I saw this image, I fell in love with it. (I added the "I (heart) Pop Pop").


The inside is stamped with "Happy Father's Day!"

Finished Card: 4 1/4" x 5 1/2"

Materials:
Cardstock: White, and Patterned Paper
Melonheadz Illustrating Digital Image
Spectrum Noir Markers
CardzTV with Mary Clear Stamps It's a Guy Thing! "You're the REEL Deal!" and "Happy Father's Day!"
StazOn Jet Black Ink
Ultra Fine Premium Glitter Extra Fine Multi Diamond Dust
Mounting Tape

I glittered the fish (although I think it's hard to see in the picture). The image is single mounted on the card base.

I thought I would enter this into two challenges: Daring Cardmakers (Make a masculine card with a sports theme) and Simon Says Stamps Challenge (Anything Goes).

Hope you like my card. Thanks for stopping by.

imagine what you could do...

Thursday, April 26, 2012

Happy (Humming)BIRD-day

I really like the way this card turned out.


Now you have to understand, it's on a (home-made) "Action Wobble", so it looks like the hummingbird is collecting nectar from the trumpet flower. (The "action" never shows up on the photo).

Finished Card: 4 1/4" x 5 1/2"

Materials:
Cardstock: Cream, White (for printing the images), Green and Patterned Paper
Melonheadz Illustrating Digital Image Hummingbird
Clipped Art from Internet Trumpet Flower
Spectrum Noir Markers
CardzTV with Mary Clear Stamps Make A Wish "Happy BIRD-day!"
StazOn Jet Black Ink
Home-made "Action Wobble"
Mounting Tape

I am entering this into the CropStop challenge "To the birds..."

I was lucky enough to have the chance to go to New York City yesterday, spend the night and go see the taping of "The Chew" this morning. My friend and neighbor got the tickets and invited three of us to join her. It was fun and very interesting (in more than one way...but I guess you really had to be there...lol) I really give her credit because she can drive in New York City (not something that I think I could do!) After the taping of the show, we ventured around the city a little bit before coming home. (Thanks Janet!)

Thanks for stopping by. Hope you like the card.

imagine what you could do...

Monday, April 23, 2012

Opps...

The Paper Players has a challenge this week that is a sketch. Click here to see it.

Here is my card:


and the inside:


Finished Card: 4 1/4" x 5 1/2"

Materials:
Cardstock: White, Black, Red and Patterned Paper
Hampton Art Foot Longs Clear Stamps Skunk and "Opps"
VersaMark Watermark Ink
Black Embossing Powder
Martha Stewart Edger Doily Lace Punch
Computer Sentiment (inside card)
Mounting Tape

I thought he was a cute little stinker!

I'd also like to share a photo of my youngest son. Jeff is becoming a Volunteer Firefighter for our community. I had to take a picture of him in his uniform. I'm very proud.


Thanks for stopping by.

I'm also entering this into the CropStop challenge (Hand Made Paper Lace Work).

imagine what you could do...

Sunday, April 22, 2012

CardzTV with Mary Stamps Challenge # 8 "Color Me A Rainbow" Day 3 "Back On Your Feet"

I have another card for Day 3 of CardzTV challenge "Color Me A Rainbow" (Make a card or project for any occasion using the colors of the rainbow...use pink, blue, yellow and green only...you can use a small amount of white and black also).

Here is my card:


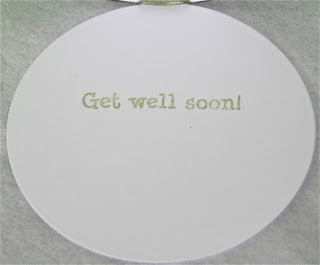
and the sentiment inside:


 Finished Card: 3 1/2" in diameter

Materials:
Cardstock: White, Green and Patterned
Birds Cards Digital Image
Spectrum Noir Markers
CardzTV with Mary Clear Stamps Encouraging Thoughts "Get Well Soon"
Spellbinders Nestabilities Standard Circles Large, Largest and Second Largest Circles
Green Pigment Ink
Thin Green Ribbon
Mounting Tape

I don't make shaped cards very often, but I thought that this image just wouldn't look good any other way. Also, because of the writing on the image, I stamped the CardzTV sentiment on the inside. I folded over a piece of white cardstock and then cut the base card using the largest Nestabilities circle by leaving a small area inside the cutting area, so I would have a hinge for the card. I then cut the full size circle with the patterned cardstock and adhered it to the top of the white base card. I then cut the next size down circle out of the green cardstock. I single mounted the image circle on top of the green circle and also single mounted the green circle on the patterned circle, in order to give a little more dimension to a fairly simple card. I think the ribbon gives a finished touch. You'll also notice that my "rainbow of colors" did not include pink on this card. (Oooo, I hope I don't get into too much trouble for that...lol).

Don't forget to check out the other designer's projects AND that Mary at CardzTV is giving away a set of stamps (your choice) to the winner of the challenge. So, if you haven't entered yet, get crafting.

Thanks for stopping by. I would love to hear what you think, so please leave a comment. (Hope you saw my other two cards for this challenge the past two days...just scroll down if not...thanks again)

imagine what you could do...

Saturday, April 21, 2012

CardzTV with Mary Stamps Challenge # 8 "Color Me A Rainbow" Day 2 "Eat Cake"

Day 2 for the challenge at CardzTV this week called "Color Me A Rainbow" (Make a card or project for any occasion and use colors from the rainbow: pink, blue, green and yellow only...you can use a small amount of black and white also). I actually struggled with this for awhile, but then I made this card (I hope you like it):


Finished Card: 4 1/4" x 5 1/2"

Materials:
Cardstock: Two Shades of Pink, Blue,Yellow, White and Green Patterned
Melonheadz Illustrating Digital Image
Spectrum Noir Markers
CardzTV with Mary Clear Stamps Make A Wish "EAT cake!" and "Happy Birthday!"
StazOn Jet Black Ink
EK Success Border Punch Swiss Cheese
Inkssentials Glossy Accents
Nicole Ultra Fine Premium Glitter Extra Fine Multi DiamondDust
Mounting Tape

I printed out the image on white cardstock, then colored it in. I colored the background with a different shade of blue, as I didn't want any white cardstock showing. I used glitter on the star and Glossy Accents on the "Icing" and the "Swirl".  I double framed the image, then single mounted it on the green. I stamped "Happy Birthday!" on the inside, but forgot to take a picture.

Please join the challenge over at CardzTV. The winner will have their choice of any of Mary's CardzTV Stamp sets. Woo Hoo! The Challenge runs April 20, 21 and 22. Have fun and don't forget to check out the other Designer's projects. (We have some very talented ladies).

Thanks for stopping by. (Hope you checked out my card yesterday and come back tomorrow, I have a new one).

imagine what you could do...

Friday, April 20, 2012

CardzTV with Mary Stamps Challenge # 8 "Color Me a Rainbow" Day 1 April Showers

This is the first day of the CardzTV with Mary Stamps Challenge "Color Me A Rainbow!" (Use the colors of the rainbow...pink, blue, yellow and green only...you can use a small amount of white and black also). Here is an Easel card that I made. I have only ever made a handful of them. Hope you like it.


Finished Card (when closed): 4 1/4" x 5 1/2"

Materials:
Card stock: White (for the base), Blue, Blue Patterned, Pink and Yellow Patterned, Green and Green Patterned
Cricut Cartridge Everyday Pop-Up Cards Umbrella, page 36 (Pop-Up Base)
CardzTV with Mary Clear Stamps Think Spring "How does your garden grow?" and "Friends are the flowers in the garden of life"
StazOn Jet Black Ink
Inkssentials Glossy Accents
Jolee's Boutique Stickers Vellum Tulips
Sugarloaf Whipsers Strokes Marker (Pink and Tan)
Mounting Tape

The base of the card is 5 1/2" x 8 1/2". I scored it in the middle at 4 1/4" and then half of that at 2 1/8". I cut the umbrella out at 6" twice (once in white and once in patterned paper). I cut off all the tabs on the patterned piece, colored the umbrella handle tan, then glued the top to the white base.  It's hard to see but I added stitch lines with the tan marker to the umbrella also. I glued the blue patterned paper to a separate piece of white card stock (cut at 4 1/4" x 5 1/2"). Next, I added the popped-up umbrella (the tab from the handle goes under to the back of the separate white base). I added the Glossy Accents to the blue background and the umbrella. After it was dry, I single mounted the sentiment. I glued green patterned paper to the "inside" of the base card, added the mounted sentiment and then adhered the tulips. Finally I glued a piece of blue card stock to the back of the umbrella piece and then glued it to the easel base. Now I will confess, that before I added the blue card stock to the back, I started to glue it to the easel base but realized that I only have to glue half of it to fit on there. So that's why I added the blue card stock. Mistakes? There are NO mistakes...just lessons learned!) lol

Mary at CardzTV is giving away one of her stamp sets (your choice) to the winner of the challenge. The Challenge runs April 20, 21 and 22. Check out all the other projects also. 

I am entering this card into several other challenges:
CardzTV "April Showers" (Any occasion using an umbrella, rain boots, clouds, raindrops, puddles, etc)
My Cuttlebug Spot, Make an Easel Card
Made Especially for You, Use 3 Flowers
My Craft Spot "Make It Pop!" (Use dimension)
Fantabulous Cricut "April Showers" (Use an umbrella, rain or clouds) 

Thanks for stopping by today. (Leave a comment). Don't forget to drop by on Sat and Sun too. I have two more cards. 

imagine what you could do...
Related Posts with Thumbnails