Showing posts with label Spellbinders Nestabilities Standard Circles Large. Show all posts

Friday, June 15, 2012

Digi Haven Challenge #2 Flowers

The challenge this week at Digi Haven is to use a (free) Floral image. Please link back to the artist/website to give them the credit they deserve. Now honestly, I had started with a different image; but after I finished it, I didn't really care for it. (Maybe I'll print it out again and try something else). Sometimes, I'm my own worst enemy (lol). So anyway, this is what I came up with this time...what do you think?


Wanted you to see the layered flowers:


Finished Card: 4 1/4" x 5 1/2"

Materials:
Cardstock: White, Blue and Patterned
Beccy's Place  Digital Image
Spectrum Noir Markers
CardzTV with Mary Clear Stamps Encouraging Thoughts, "Thinking of You"
Black Pigment Ink
Black Embossing Powder
Spellbinders Nestabilities Standard Circles Large, Largest
Queen and Co Rhinestones Grass Green, 2 Small
Mounting Tape

I like the look of the layering...give's dimension...so what I have been doing is to print out 2 copies of the same image, same size. Then, if I decide to layer, I just have to color both images the same. (This alleviates having to go back and guess the size of the image). If I don't layer, then I have a second image for another card already printed out.

I hope you will join us in the challenges. Have some fun...there are so many free digi's out there. Tell your friends too.

Thanks for stopping by.

imagine what you could do...


Sunday, April 22, 2012

CardzTV with Mary Stamps Challenge # 8 "Color Me A Rainbow" Day 3 "Back On Your Feet"

I have another card for Day 3 of CardzTV challenge "Color Me A Rainbow" (Make a card or project for any occasion using the colors of the rainbow...use pink, blue, yellow and green only...you can use a small amount of white and black also).

Here is my card:


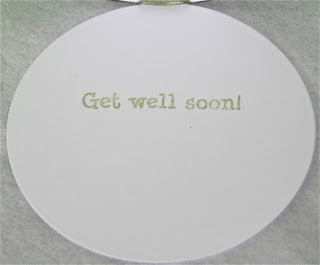
and the sentiment inside:


 Finished Card: 3 1/2" in diameter

Materials:
Cardstock: White, Green and Patterned
Birds Cards Digital Image
Spectrum Noir Markers
CardzTV with Mary Clear Stamps Encouraging Thoughts "Get Well Soon"
Spellbinders Nestabilities Standard Circles Large, Largest and Second Largest Circles
Green Pigment Ink
Thin Green Ribbon
Mounting Tape

I don't make shaped cards very often, but I thought that this image just wouldn't look good any other way. Also, because of the writing on the image, I stamped the CardzTV sentiment on the inside. I folded over a piece of white cardstock and then cut the base card using the largest Nestabilities circle by leaving a small area inside the cutting area, so I would have a hinge for the card. I then cut the full size circle with the patterned cardstock and adhered it to the top of the white base card. I then cut the next size down circle out of the green cardstock. I single mounted the image circle on top of the green circle and also single mounted the green circle on the patterned circle, in order to give a little more dimension to a fairly simple card. I think the ribbon gives a finished touch. You'll also notice that my "rainbow of colors" did not include pink on this card. (Oooo, I hope I don't get into too much trouble for that...lol).

Don't forget to check out the other designer's projects AND that Mary at CardzTV is giving away a set of stamps (your choice) to the winner of the challenge. So, if you haven't entered yet, get crafting.

Thanks for stopping by. I would love to hear what you think, so please leave a comment. (Hope you saw my other two cards for this challenge the past two days...just scroll down if not...thanks again)

imagine what you could do...

Monday, March 19, 2012

Mouse and a Daisy Birthday Card

Pin It

I made a card for two challenges: The Paper Players (Clean and Simple featuring Buttons) and Birthday Sundaes (Birthday Card with an Animal on it).


It's a Gate-fold card:


Finished Card: 4 1/4" x 5 1/2"

Materials:
Cardstock: White, Green and Patterned Paper
Sliekji's Digi Stamps
Spectrum Noir Markers
Spellbinders Nestabilities Standard Circles Large, 2nd, 3rd and 5th
Homemade "Baker's Twine" from Aunt Lydia's Crochet Thread
Inkadinkado Thinking of You Clear Stamps All Occasions "Happy Birthday" from "Happy Birthday to a Special Person!"
Black Pigment Ink
Yellow/Orange Pigment ink (around edges of both green circles)
Three Buttons, 1 Large Orange/Red, 1 Medium Mint Green and 1 Medium Pink
Mounting Tape

I hope you like the way this came out.

Had a really nice dinner for St Patrick's Day...corned beef, cabbage and potatoes...yum. I would like to also share a picture with you of my granddaughter, Gianna. Isn't she a cutie?


I also entered this into another challenge: Made Especially For You (Make a card featuring 3 buttons)....(Thank you Becky for the info).

Thanks for stopping by...

imagine what you could do...

Sunday, February 26, 2012

Get Messy Birthday Card

Pin It

Birthday Sundaes has a challenge this week called "Get Messy Birthday Card" (use lots of inking, paints or mists).

Here is my card:


Finished Card: 4 1/4" x 5 1/2"

Materials:
Cardstock: White and Orange/Yellow
Inkadinkado Clear Stamps, Birthday Cupcake (Large Cupcake and "Sweet Birthday Wishes")
StazOn Jet Black Ink
Sugarloaf Whispers Strokes Markers
Cuttlebug Embossing Folder Happy Birthday
Five Different Colors of Pigment Inks
Spellbinders Nestabilities Standard Circle Large, 3rd Largest
Spellbinders Nestabilities Labels Five, 3rd Largest
Ribbon
Mounting Tape
Sponge
Water Mister

First, I embossed some white card stock, then wiped the pigment inks all over. Next, I misted it with a little water. Then, I took the sponge (I used a make-up wedge) and wiped over the ink in a circular motion. Let dry. I cut out the Labels Five shape and used the same technique on that. I stamped the cupcake with StazOn Ink and colored that with the Sugarloaf Markers. I fussy cut the cupcake. Cut the large rectangle and circle, then I assembled everything together.

I had fun with trying something different...and this is why I love challenges! Don't be afraid to experiment...what's the worst that can happen? You throw out the paper and start again! However, you just might make a masterpiece...lol. (Now if I would only take my own advice and try vinyl...hahaha...someday!).

Thanks for stopping by...I would love to hear from you.

imagine what you could do...

Tuesday, January 17, 2012

Snowman

I was looking through some challenge blogs the other day, and I saw a card that a blogger made and thought it was really cute. I decided to try to make my version of it. 


Finished Card: 4 1/4" x 5 1/2"

Materials:
Cardstock: White, Blue, Red, Brown, Orange and Patterned Paper
Spellbinders Nestabilities Standard Circles Large (2nd, 4th and 6th Circles)
Queen and Co Pearls, Nightfall 2 Medium, 3 Small
Small Heart Punch
Studio G clear Stamp "My Friend"
StazOn Black Ink
LePlumme Marker, Black
Glitter
Charcoal Chalk
Mounting Tape

I cut the 3 circles out and stacked them with mounting tape. I chalked around the edges for depth. The scarf and arm branches are from scraps and cut by hand. I glittered the edges for more depth and to look like snow on the nose, scarf and branches. The mouth was made with dots from the marker. It's hard to see in the photo but the scarf ends are cut to look like fringe.

If you would like to see the original card, click here. Thank you BooScraps for the inspiration.

Hope you like my version. Tell me what you think....leave a comment.

imagine what you could do...
Related Posts with Thumbnails